User Tools
Sidebar
Table of Contents
DHCP Scope Options
proVconnect Agent can use DHCP to obtain some operating parameters automatically. This is enabled/disabled by toggling the checkbox on the Agent Configuration page as show below. The default state is Enabled.
There are three different data sets that can be provisioned by the DHCP server:
| Description | Option Number |
| FTP Server Settings for Agent Update | Scope Option 170 |
| Agent Tags | Scope Option 171 |
| proVconnect Server Address | Scope Option 172 |
Configure DHCP Scope using the instructions below (based on DHCP server type):
DHCP Options Settings for Windows
DHCP Settings - Add Options
The setting for the DHCP scope options follows well-defined logic. The following example illustrates the configuration of DHCP on Windows Server 2003.
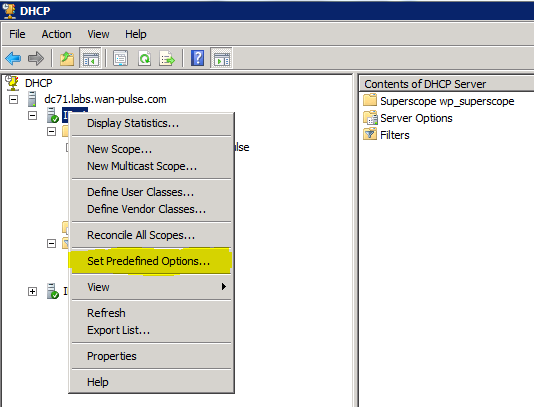
Right-click on the server node, and then click Set Predefined Options….
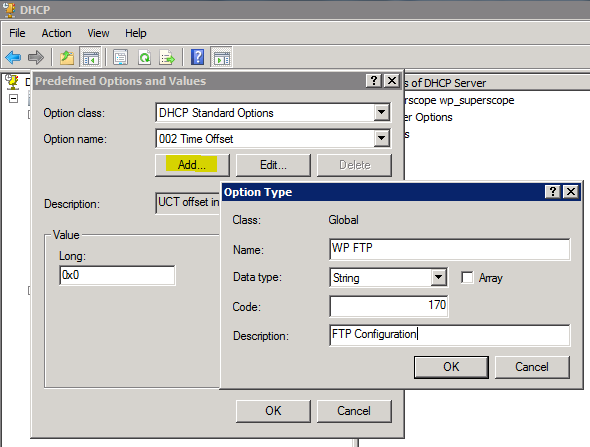
Click Add… and then fill in the fields as shown below:
Click OK.
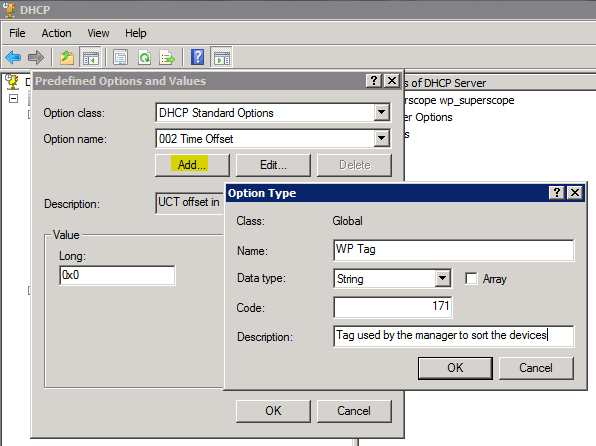
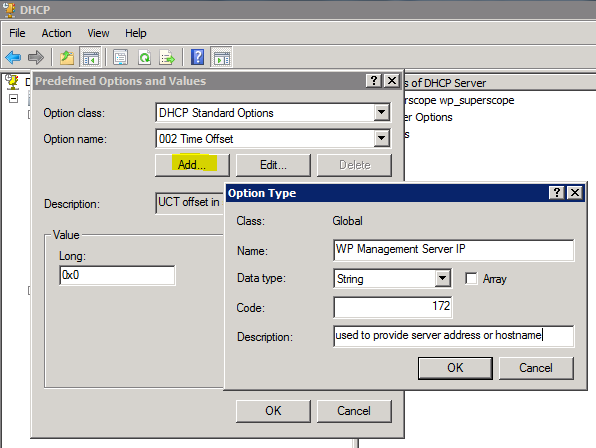
Repeat these steps to configure the WP Tag and the Manager Address.
DHCP Option 170 - WP FTP Update
Select the 170 option in the drop-down list and fill in the fields as shown below:
| Parameters | Description |
| @WP: | Start of tag |
| IpServer | IP address of the FTP server |
| ; | Mandatory parameter separator |
| Port | Port number of the FTP server |
| ; | Mandatory parameter separator |
| Login | Login used for connection to the FTP server |
| ; | Mandatory parameter separator |
| Password | Password used for connection to the FTP server |
| ; | Mandatory parameter separator |
| Path | Full path to the file InfoVersion.xml |
| ; | Mandatory parameter separator |
| AutoUpdate | Boolean indicating whether or not automatic update by FTP is active. Possible values are true OR false |
| :@WP | End of tag |
DHCP Option 171 - WP Tags
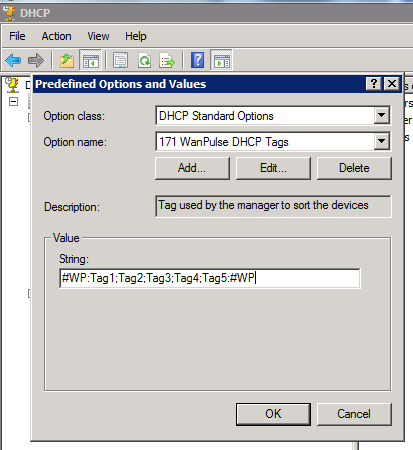
Select the 171 option in the drop-down list and fill in the fields as shown below:
| Parameters | Description |
| #WP: | Start of tag |
| Tag1 | Tag1 entry |
| ; | Mandatory parameter separator |
| Tag2 | Tag2 entry |
| ; | Mandatory parameter separator |
| Tag3 | Tag3 entry |
| ; | Mandatory parameter separator |
| Tag4 | Tag4 entry |
| ; | Mandatory parameter separator |
| Tag5 | Tag5 entry |
| :#WP | End of tag |
DHCP Option 172 - Manager Address
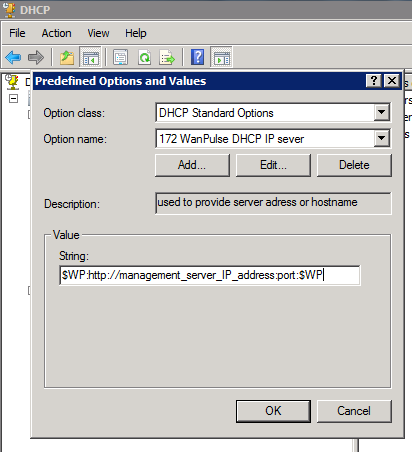
Select the 172 option in the drop-down list and fill in the fields as shown below:
| Parameters | Description |
| $WP: | Start of Manager Address |
| http://management_server_IP_address:port | Address of the Manager |
| :$WP | End of Manager Address |
Enable Scope Options
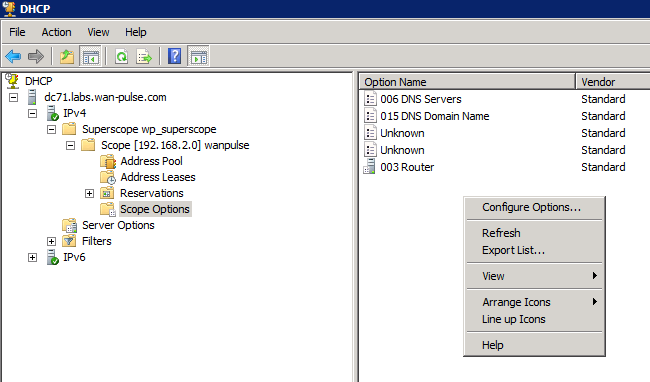
Click on the node corresponding to the scope covered by the tag, right-click, and select Configure options….
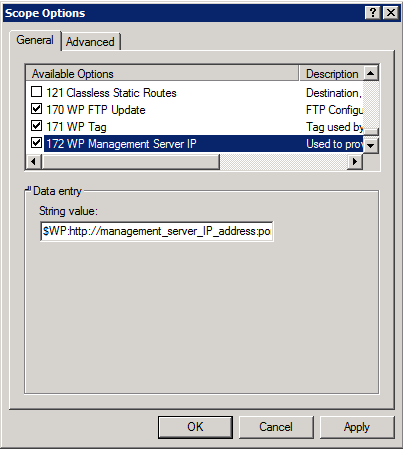
Select 170, 171 and 172, and then validate.
When configuration is complete, the three new options appear.
DHCP Options Settings for Linux
Edit dhcp file settings: /etc/dhcp/dhcpd.conf and add following lines for WanPulse DHCP Scopes Options:
In main section:
option WP_FTP_Update code 170 = string;
option WP_Tag code 171 = string;
In “subnet” section:
option WP_FTP_Update "@WP:IPServer;Port;Login;Password;Path;AutoUpdate(True|False):@WP";
option WP_Tag "#WP:Tag1;Tag2;Tag3;Tag4;Tag5:#WP";
Example:
option subnet-mask 255.255.255.0;
option broadcast-address 192.168.1.255;
option routers 192.168.1.254;
option domain-name-servers 192.168.1.1, 192.168.1.2;
option domain-name "wanpulse.com";
option ntp-servers 192.168.1.254;
option WP_FTP_Update code 170 = string;
option WP_Tag code 171 = string;
subnet 192.168.1.0 netmask 255.255.255.0 {
option WP_FTP_Update "@WP:192.168.1.79;21;anonymous;test;/ftpupdate;true:@WP";
option WP_Tag "#WP:world;emea;france;paris;dev:#WP";
range 192.168.1.10 192.168.1.100;
range 192.168.1.150 192.168.1.200;
}

